Credit to April Edwards for part of this solution in the article.
The scope for this solution is that the Azure virtual machine needs to retain the MAC address when utilizing Azure Site Recovery failovers.
In the Azure Site Recovery Docs this scenario is called out as an issue.
- How can I migrate/protect software which requires a persistent MAC address on the virtual machine?
“Azure does not support persistent MAC addresses and so software with MAC based license models cannot be used for both on-premises to Azure migration or disaster recovery.”
The supporting article found that if you add a secondary network interface this new interface can be used to change the Network Address (MAC address) to what is needed for the software application.
NOTE: It is highly recommended that you perform Azure Backups of the Virtual Machine that you are using for Site Recovery. In the case that you need to restore the machine if the MAC address would happen to be set on the wrong interface the machine will become unusable.
Do not open a support case stating that the MAC address has been changed utilizing the Azure Portal as this is not supported. The case would need to specify that an extension or PowerShell was used to set the MAC address from inside of the virtual machine.
Windows Example
Steps to address this solution:
- Create an Azure Virtual Machine.
NOTE: Currently as of 11/2023 new virtual machines are defaulted to use Trusted Launch option, which is not supported with Azure Site Recovery. Make sure this is changed to Standard.
Select:

- Once the virtual machine is created, stop the virtual machine to allow adding a new network interface and attach it to the virtual machine.
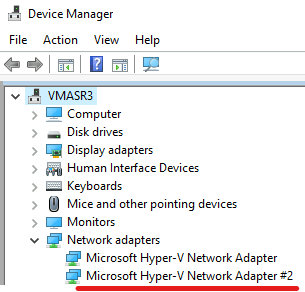
- Go to Device Manager.
- Under Network Adapters you will see 2 adapters with the underlined network adapter as the new adapter that was created.
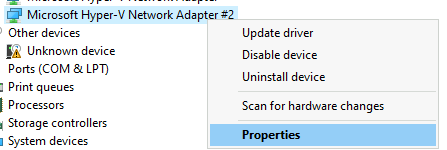
- Right click on the second network adapter and go to properties.
- Go to the Advanced Tab and scroll down to Network Address.
- Enter the MAC Address and hit OK.
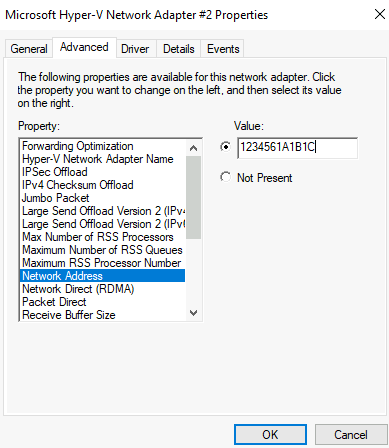
- Once this is changed you should be able to go to ipconfig/all and see the new Physical Address.

- Create a folder called “C:\scripts” on the virtual machine.
- Link to GitHub Example script file. ChangeMacAddress.ps1
- Save this powershell script to the C:\scripts folder to be called from the recovery plan. Ensure that the files names are the same “changeMacAddress.ps1”.
- Change the example MAC address to your MAC address.
# Determine the active network adapter on the machine, and then compare this interface with the others attached to the Virtual machine.
# Use the interface that is not active to be change the MAC address
#
$defaultAdapter = (Get-NetRoute | Where-Object { $_.DestinationPrefix -eq '0.0.0.0/0' } | Get-NetIPInterface).InterfaceAlias
$activeAdapters = Get-NetAdapter | Where-Object {$_.Status -eq 'Up'} | Select-Object -ExpandProperty Name
$activeNonDefaultAdapters = $activeAdapters | Where-Object { $_ -ne $defaultAdapter }
$activeNonDefaultAdapters
Disable-NetAdapter -Name $activeNonDefaultAdapters -Confirm:$false
# Set the new MAC address
Set-NetAdapterAdvancedProperty -Name $activeNonDefaultAdapters -RegistryKeyword NetworkAddress -RegistryValue "1234561A2B3C"
Enable-NetAdapter -Name $activeNonDefaultAdapters- At this point the machine is ready to be replicated with Azure Site Recovery.
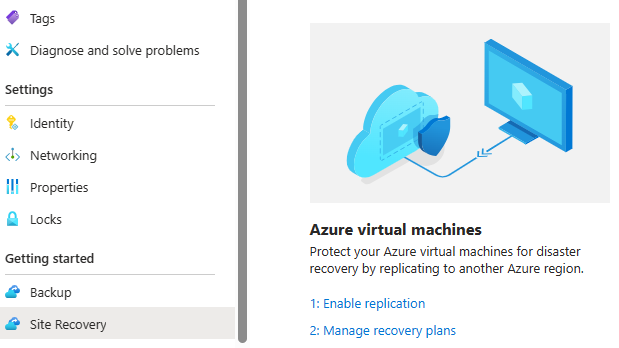
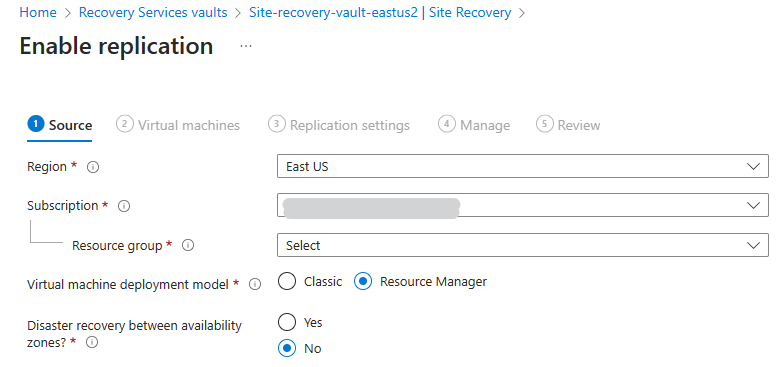
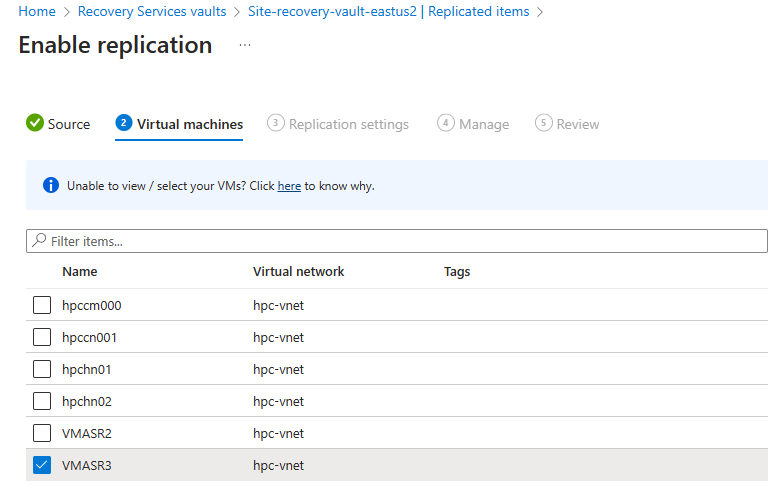
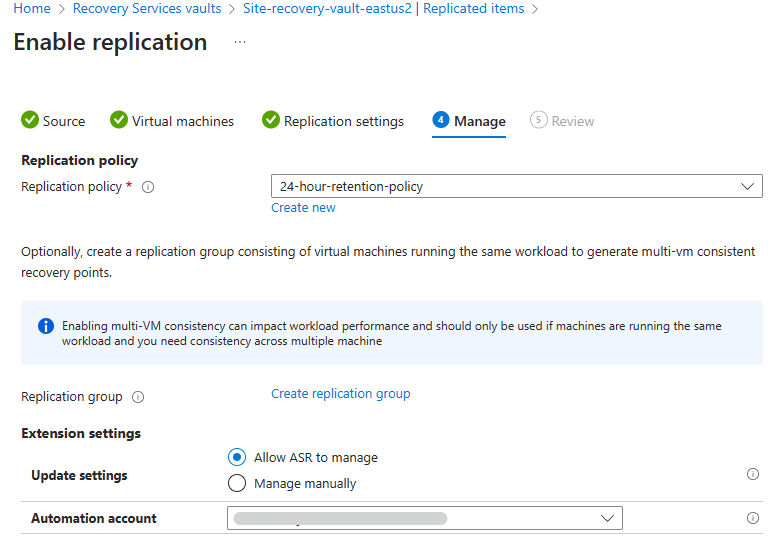
- Go to the Recovery Services Vault in the secondary region that you would want to failover to. Under “Getting started” select Site Recovery, and then “Enable Replication”
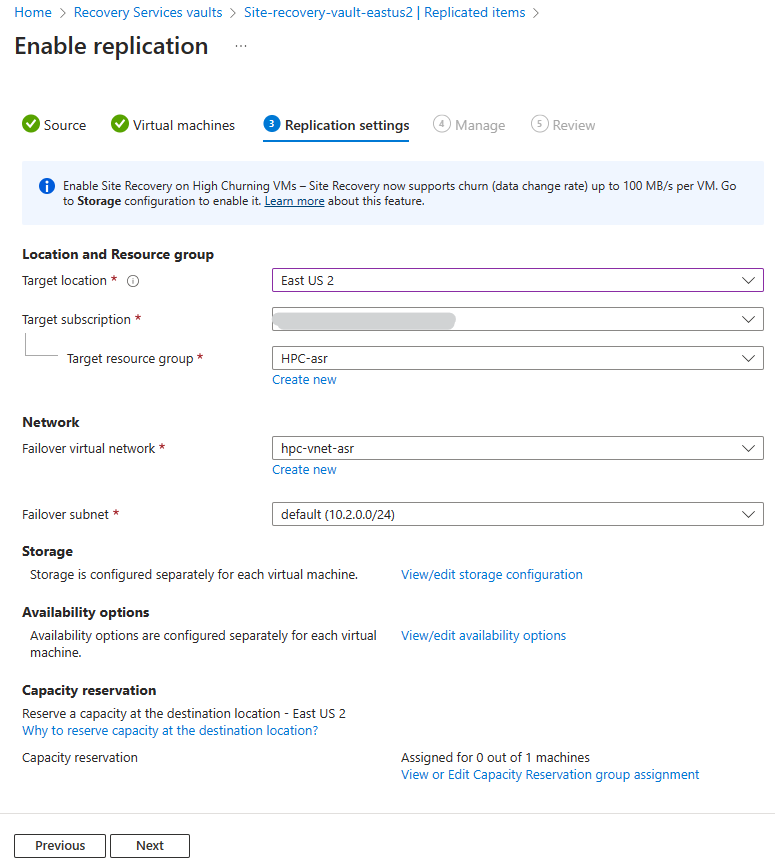
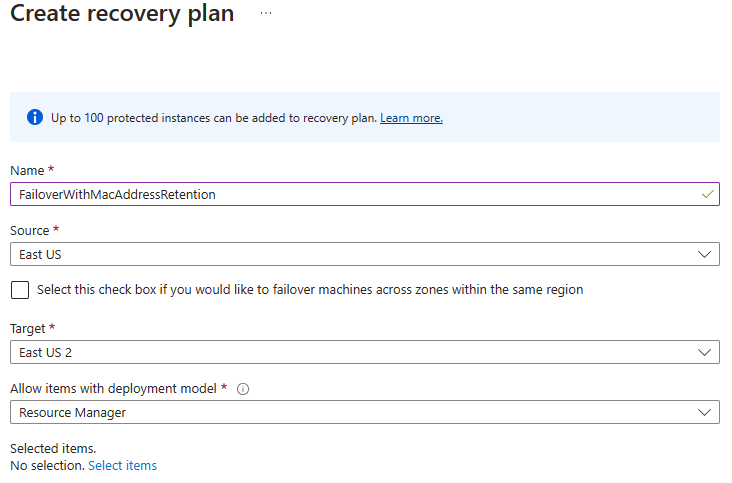
In this example the virtual network and subnet pre-exist in the region that we will failover to East US 2.
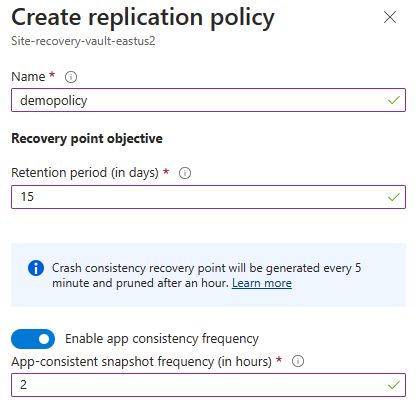
Configure the replication policy if the default 24-hour retention-policy is not suitable. For example, the policy can retain backups up to 15 days now, and application consistent backups. (days below are configurable to your scenario)
- Enable the replication. This will take some time to replicate to another region depending on the size of the VM.
- Once the Virtual machine is replicated a Replication Plan should be configured to run a post script after the failover is completed.
- Create an Azure Automation Account for the post action script to run from (in upcoming steps)
- Make sure the Automation account Region is different than the source Region. (check this on zonal failover)
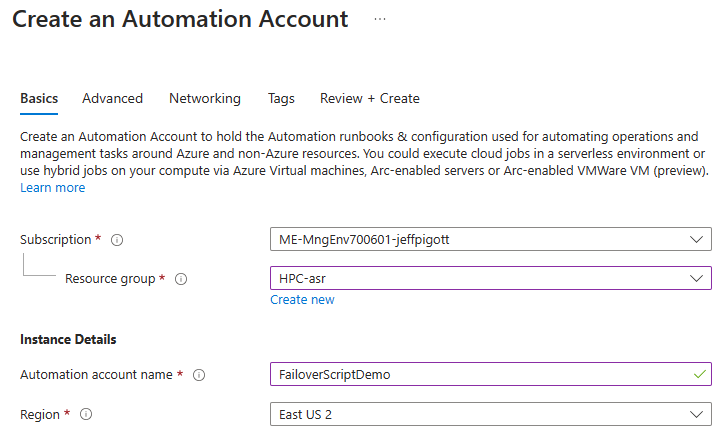
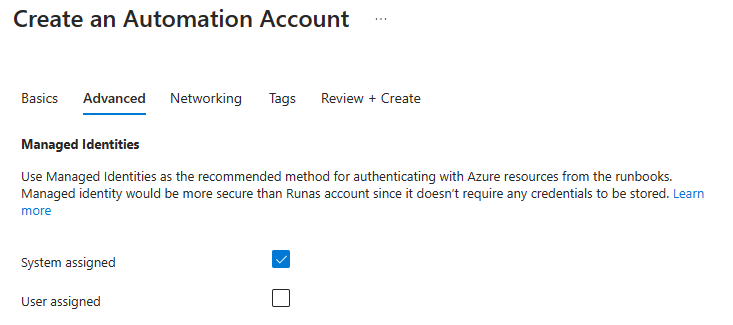
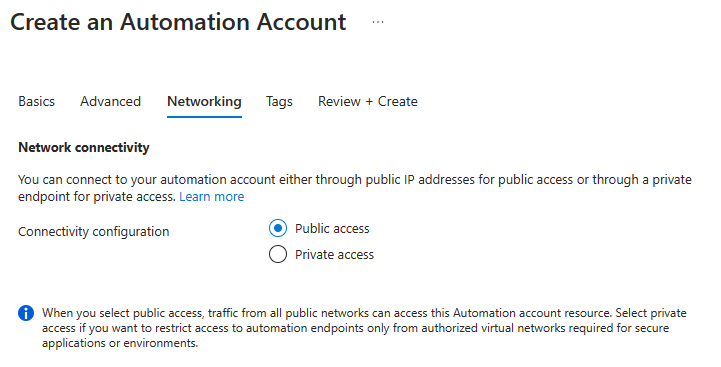
- Enter Tags if needed and then go to Review + Create. Press Create to create the Automation Account.
- Go to the Automation account after it is finished being created.
- Choose Runbooks.
- Create a runbook
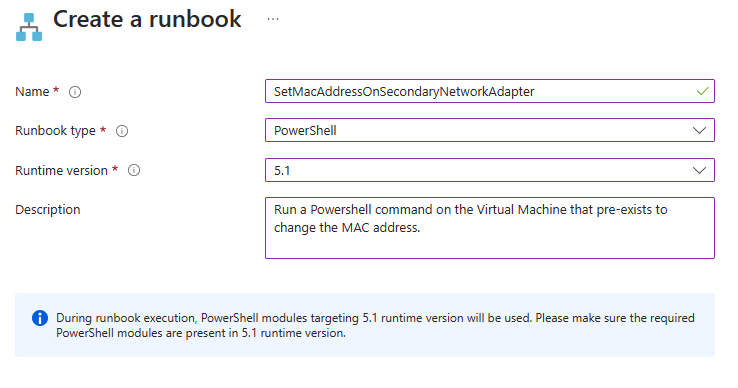
- Press the Create button to create the runbook.
- Link to Github Example Runbook shown in the image below. Failover_Runbook_MACAddress.ps1
- Paste the code into the text window.
param (
    [parameter(Mandatory=$false)]
    [Object]$RecoveryPlanContext
)
$VMinfo = $RecoveryPlanContext.VmMap | Get-Member | Where-Object MemberType -EQ NoteProperty | select -ExpandProperty Name
$vmMap = $RecoveryPlanContext.VmMap
#Write-Output "vminfo is $VMinfo"
#Write-Output "vmMap is $vmMap"
Connect-AzAccount -Identity
    foreach($VMID in $VMinfo)
    {
        $VM = $vmMap.$VMID
            if( !(($VM -eq $Null) -Or ($VM.ResourceGroupName -eq $Null) -Or ($VM.RoleName -eq $Null)))
            {
    Write-output "Resource group name ", $VM.ResourceGroupName
    Write-output "Rolename " = $VM.RoleName
    # Get the VM name from Azure Site Recovery
    $vmName = $VM.RoleName
    Write-Output "This is the VMName $vmName"
    # Path to the script on the VM
    $scriptPath = "C:\\scripts\\changeMacAddress.ps1"
    # Command to execute the script
    $command = "& '$scriptPath'"
    # Run the script against all the listed VMs
                   Invoke-AzVMRunCommand -ResourceGroupName hpc-asr -Name $vmName -CommandId 'RunPowerShellScript' -ScriptString $command
    Write-Output "Finished"
            }
        }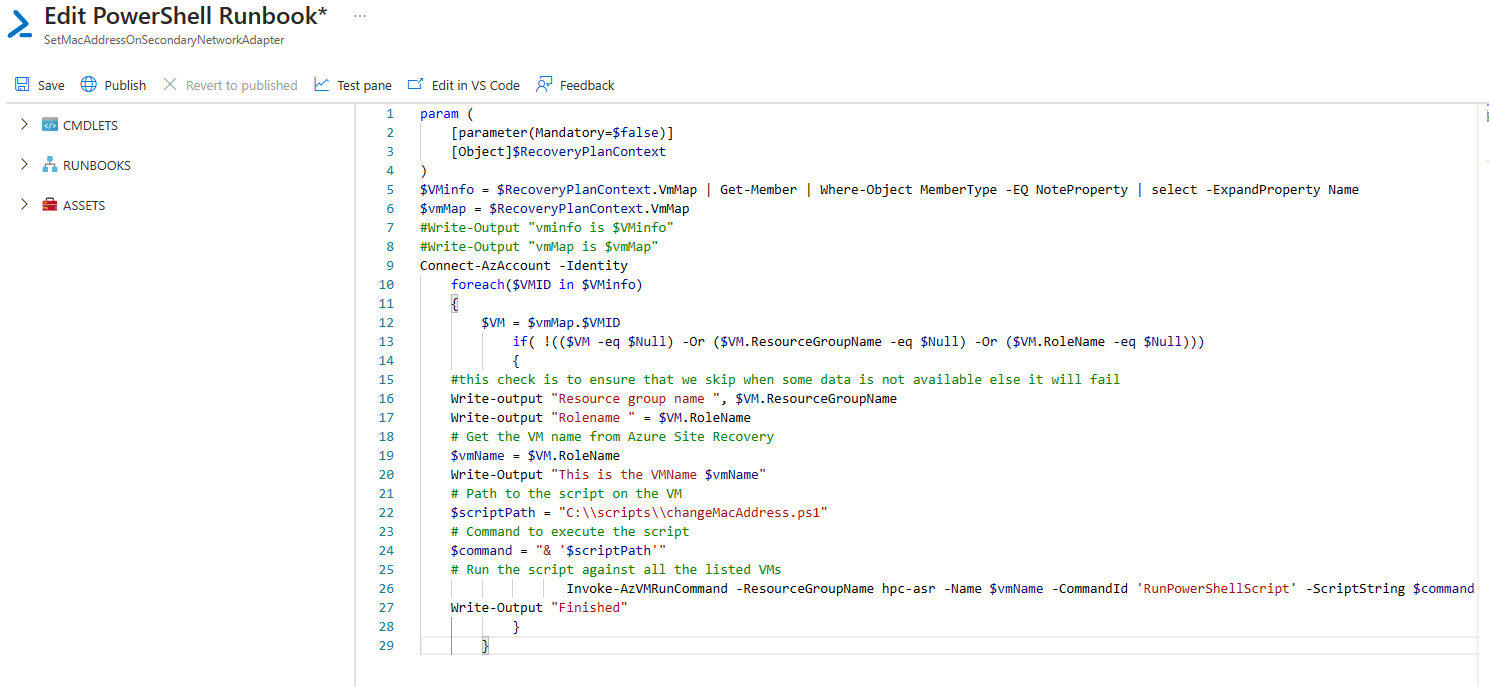
- Click Save and Publish.
The new runbook should be shown now as in the published state.

- Click Recovery Plans under the Manage section of the Recovery Services Vault.
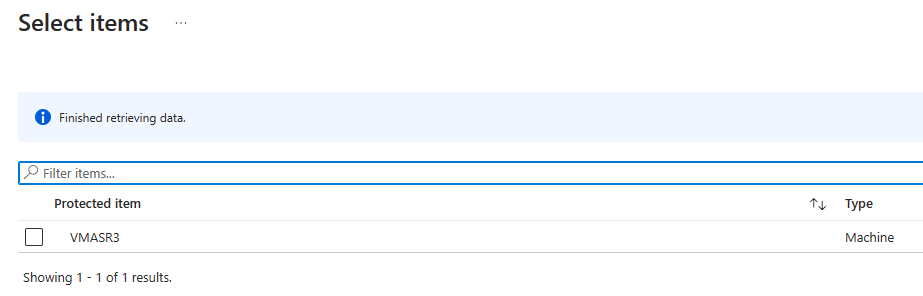
- Select the machine to be included in the recovery plan and press OK.
- In the recovery plan click Customize to edit the plan.

- Click the Group1: Start and click the … to Add post action.

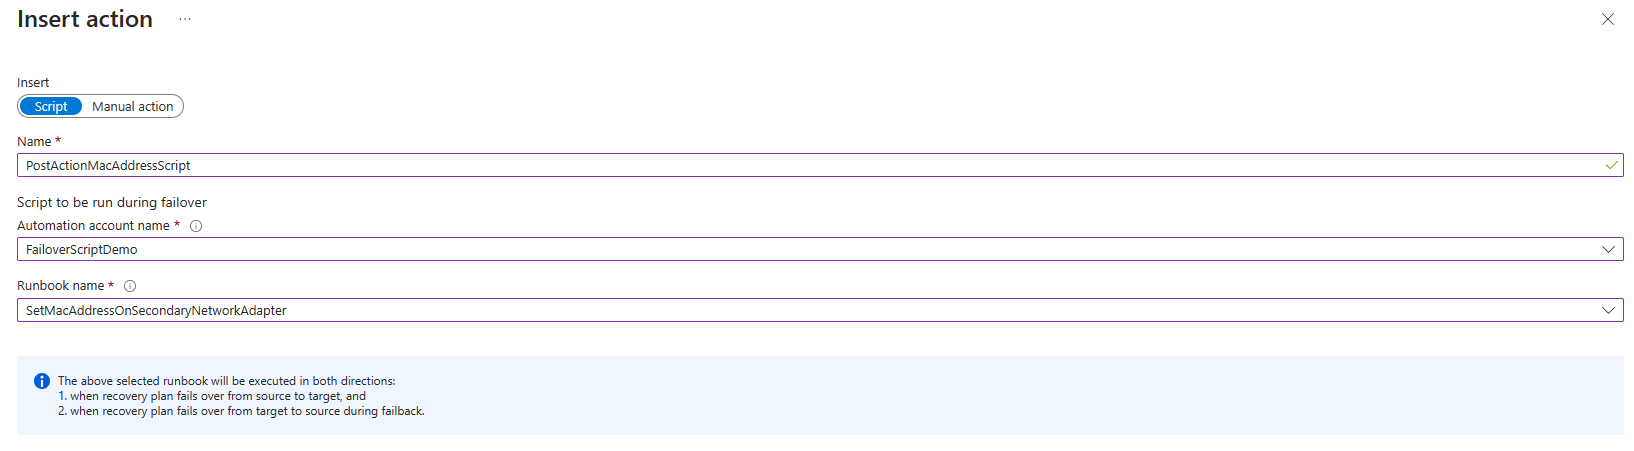
Insert the action to be executed. In this scenario, it will be using a Runbook from the automation account created above.
- Click the OK button (if the form doesn’t close just close it and you will receive a warning, but ignore it)
- Click the Save button to Save the recovery plan changes.
- Proceed testing the failover of the virtual machine by completing a “Test Failover”.

- Connect to the test machine with RDP/Bastion RDP to look at the network adapters.
- The Interface names in Device Manager may have changed as seen below.

- Check to see that the MAC address on one of the adapters has changed. It may not always be the highest numbered adapter.
- Verify that the software that requires the same MAC adapter address is working as expected.
Linux Example
Similar to the Windows example above you will create 2 scripts, one for the Azure Automation Account Runbook, and the other script that will be located on the Linux machine. It doesn’t seem that SUSE Linux changes the default adapter being used for Azure like Azure does, so in this example we are always changing the new added adapter to be used for the new MAC address.
- Create a Linux virtual machine (SUSE Linux 15 SP4) was used in this article.
- Stop the virtual machine once it is created.
- Attach a new secondary network adapter to the Linux machine this will be called “eth1” in the scripts.
- Off the \root folder create a folder called \root\scripts
- Create the LinuxBashNetworkAdapterChange.sh script in this location. Within this script you need to change the MAC Address that you would like to set on the eth1 card.
# Function to check if the link is down
check_link_down() {
    link_status=$(sudo ip link show dev eth1 | grep "state DOWN")
    if [ -n "$link_status" ]; then
        echo "Link is down."
    else
        echo "Link is up. Exiting."
        exit 1
    fi
}
# Function to check if the MAC address is set correctly
check_mac_address() {
    current_mac=$(sudo ip link show dev eth1 | awk '/link\/eth/ {print $2}')
    expected_mac="12:34:56:1a:2b:3c"

    if [ "$current_mac" = "$expected_mac" ]; then
        echo "MAC address is set correctly."
    else
        echo "MAC address is not set correctly. Exiting."
        exit 1
    fi
}

# Disable the network interface
sudo ip link set dev eth1 down
check_link_down

# Set the new MAC address
sudo ip link set dev eth1 address 12:34:56:1A:2B:3C
check_mac_address

# Enable the network interface
sudo ip link set dev eth1 up
check_link_down  # Check again after bringing the interface up
ip link set dev eth1 up- Similar to Windows Create an automation account for the runbook.
- Failover_Runbook_MACAddress_Linux.ps1 is an example that will call the LinuxBashNetworkAdapterChange.sh file.
- You can test running the script on the virtual machine by using the command: Bash LinuxBashNetworkAdapterChange.sh. This could also be a good test to ensure that Bash is in the proper path to run.
Some things to consider when implementing this. Are you failing over to another region or another zone? If you are failing over to a zone instead, you will need to create another virtual network for testing the failover as it will not allow to use the same network for test. The Azure Recovery Vault should also be in the same region as where the primary zone is located.
With failing over to a secondary region, you need to create the Azure Recovery Vault in the target region not where the primary virtual machine is located.