Introduction
In today’s fast-paced digital world, maintaining the security and performance of your servers without disrupting operations is crucial. Enter Hotpatching, a groundbreaking feature that allows you to install OS security updates on your machines without the need for a reboot. First introduced in Windows Server 2022 Azure Edition, Hotpatching works by patching the in-memory code of running processes, ensuring that your systems remain secure and operational. This blog post will delve into the configuration of Hotpatching preview features available in Windows Server 2025 Datacenter Evaluation edition.
Steps to be completed for this update.
- Connect to Azure Arc your Windows Server 2025 Datacenter Evaluation edition
- Subscribe/ unsubscribe Hotpatching service via the Azure Arc Portal
- Manage deployment of Hotpatch updates natively on Azure via Azure Update Manager
Step 1. Download the latest ISO from the evaluation center below.
Set up the VM using Windows Server 2025 Preview
- Download the ISO image or VHDX from The Evaluation center. You may have to fill in a form and provide your email address.
- On Hyper-V or other platform create a Gen 2 VM and use the option to create the VM using ISO.
- This Windows version should be 24H2 build. Run WinVer to confirm from the command line.

Step 2. Enable Virtualization Based Security
To Enable Virtualization Based Security, on the new virtual machine log in and run this command from an elevated command prompt or enable Core isolation Memory integrity from Windows Security.
Reg add "HKLM\SYSTEM\ControlSet001\Control\DeviceGuard" /v "EnableVirtualizationBasedSecurity" /t REG_DWORD /d 1 /f
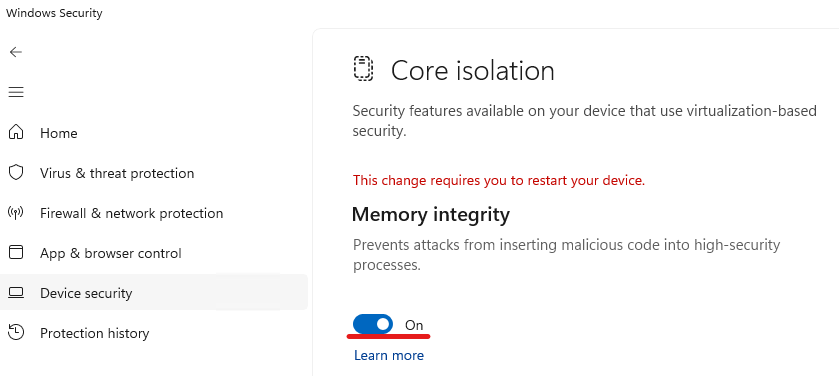
**** REBOOT After this is completed *****
Prior to this change the System Information would show that the Virtualization-based security is Not Enabled

Step 3. Install KB5040435 (7B Security update)
Install the latest updates by running Windows update. Ensure July security update is installed.
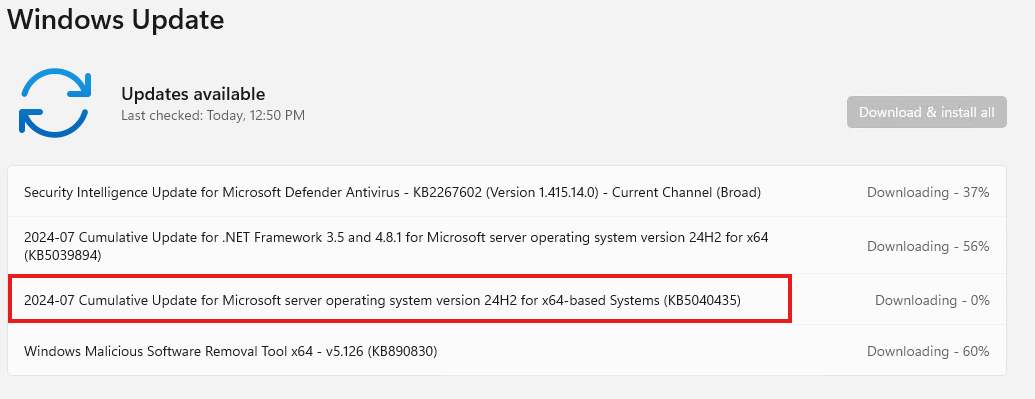
*** You will need to reboot. ***
**If you are performing the experiment on or after 8/13/24, then install July security update directly. This is needed for you to observe that August Security update will not need a reboot. Microsoft Update Catalog
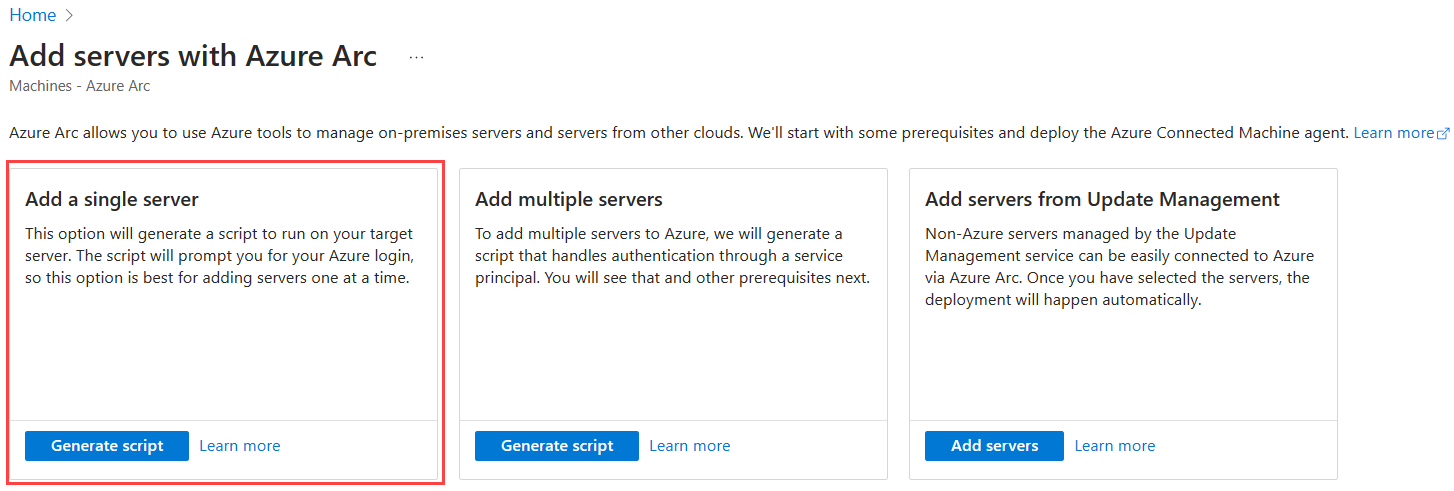
Step 4. Connect the VM to Azure Arc
You can use the existing options to add the machine to Azure ARC through the Azure Portal.
Quickstart – Connect hybrid machine with Azure Arc-enabled servers – Azure Arc | Microsoft Learn
Step 5. Update the Arc Agent with a new version – manual download to the VM.
Update the Arc Agent on your VM by running the following PowerShell:
[Net.ServicePointManager]::SecurityProtocol = [Net.ServicePointManager]::SecurityProtocol -bor 3072;
Invoke-WebRequest -UseBasicParsing -Uri "https://aka.ms/azcmagent-windows" -TimeoutSec 30 -OutFile "$env:TEMP\install_windows_azcmagent.ps1";
& "$env:TEMP\install_windows_azcmagent.ps1";
Step 6. Admin Opt In +Hotpatch Subscription
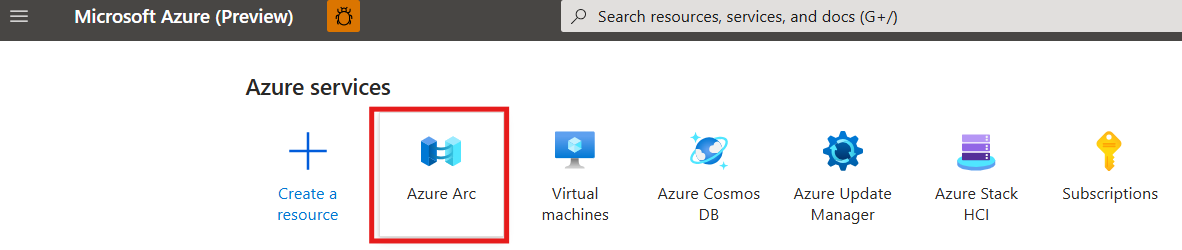
Now go to https://portal.azure.com and enable Hotpatching.
On the top of the page click on Azure Arc or search for the ARC in the search box.
Click on Machines on the left panel

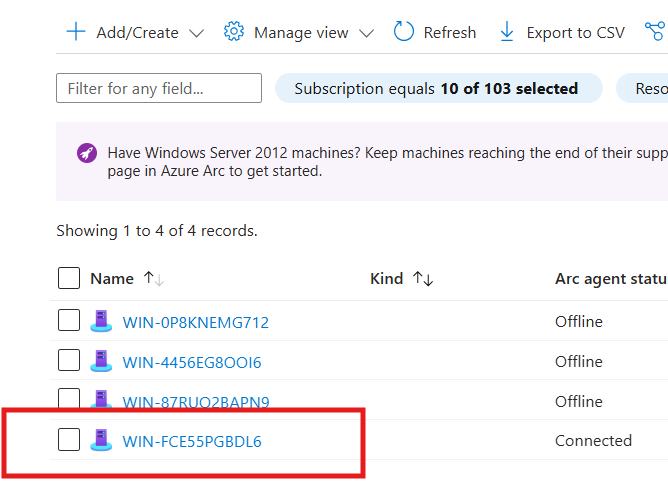
You will now see the Arc connected machine you set up in the list. Click on that
This will take you the server management page where you will see HOTPATCH card towards the bottom.
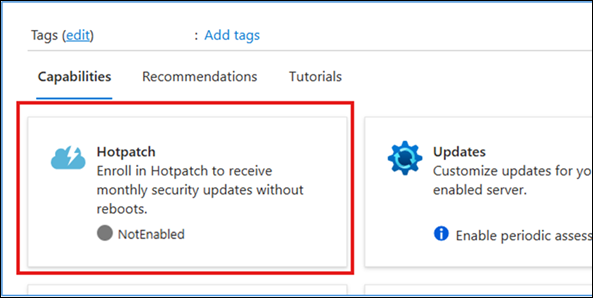
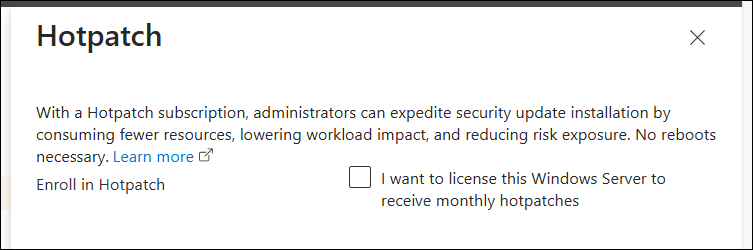
Clicking on that tile will have a fly-in page on the side that will allow you to select Hotpatching. Check the box and click the Confirm button at the bottom. Behind the scenes the Arc connected server will be configured to receive Hotpatches.
After the operation for enrollment is confirmed the Hotpatch tile shows that the service is Enabled
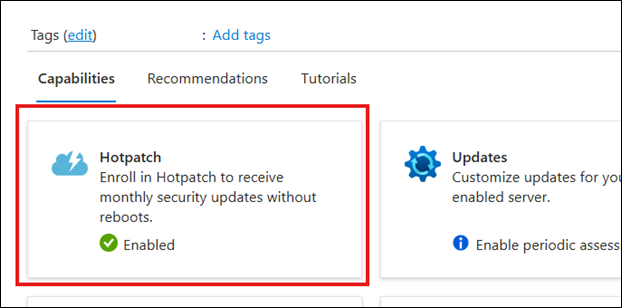
The Arc attached machine is now ready to receive Hotpatches.
Step 7. Scan and install 8B/9B/10B Hotpatch when released
As you now have the July security update (7B), which is also a Baseline, when August Hotpatch (8B) is released (8/13) it will be offered to this machine. That update should not reboot the machine.
Scan and install 8B/9B Hotpatch when released using Azure Update Manager
Using Azure Update Manager, you can identify machines that are Hotpatch eligible, install Hotpatches immediately upon release, choose your installation schedule, and track updates to maintain reliability of your machines. Here’s how to manage Hotpatches using Azure Update Manager:
- Verify that the hotpatch subscription is available or has already been enabled from the Updates tab of your Arc Server:
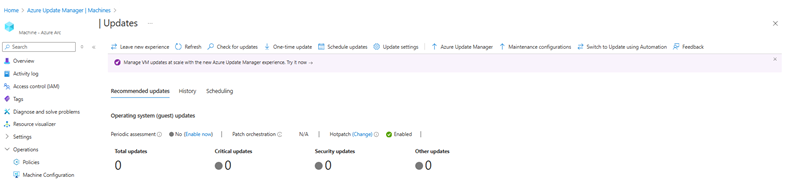
The change option above allows you to enable or cancel the hotpatch subscription on-demand.
- You can scan and view the 8B update offered to this machine by performing an assessment.
- You can choose to include the specific 8B update and when to install it on your Arc server by creating a user-defined schedule or one-time update. You can install it immediately after it is available, allowing your machine to get secure faster.
- Verify whether the 8B update has been installed and the reboot status of the machine by viewing history.
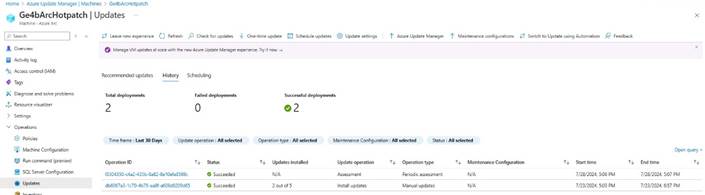
These steps provide a streamlined way to plan installation of Hotpatches on your Arc machine.
As a reference this diagram shows how hotpatching should cycle in months. Each baseline check will not require a reboot. Some items like .NET patching and other 3rd party updates may still require a reboot.

Reference Documentation: Hotpatch for Windows Server Azure Edition | Microsoft Learn
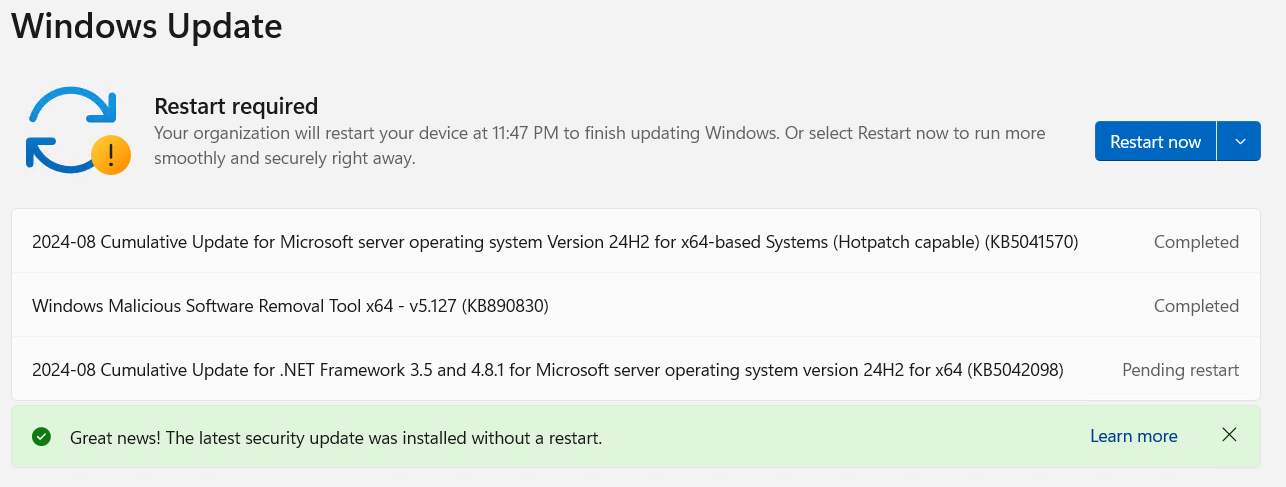
After the setup is completed, if the updates were checked within the virtual machine vs. Azure Update Manager, you could see a status showing that the update did not require a reboot.
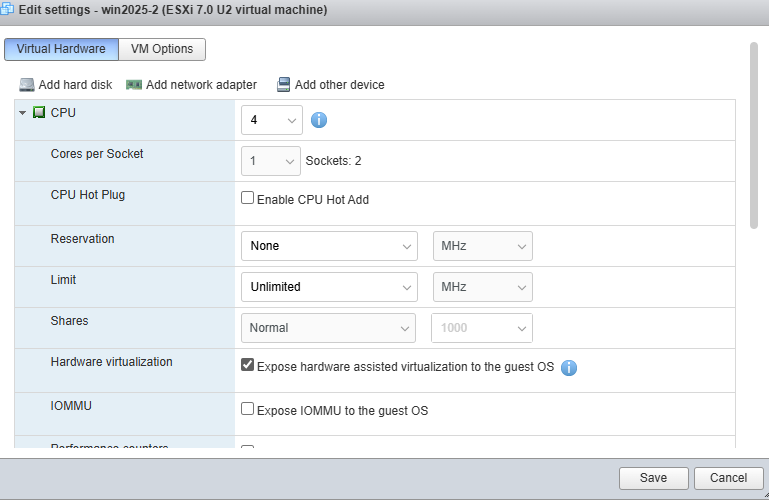
VMware configuration for the virtual machine.
As many customers are using VMware for the virtualization platform there are some specific settings needed to be utilized on the machines. These settings can be configured in ESXI or vCenter, during the installation of the machine or after the machine is created. Below are some screen shots to help you with this configuration.
In VMware check these following settings on the VM otherwise Hot Patching will not be offered.
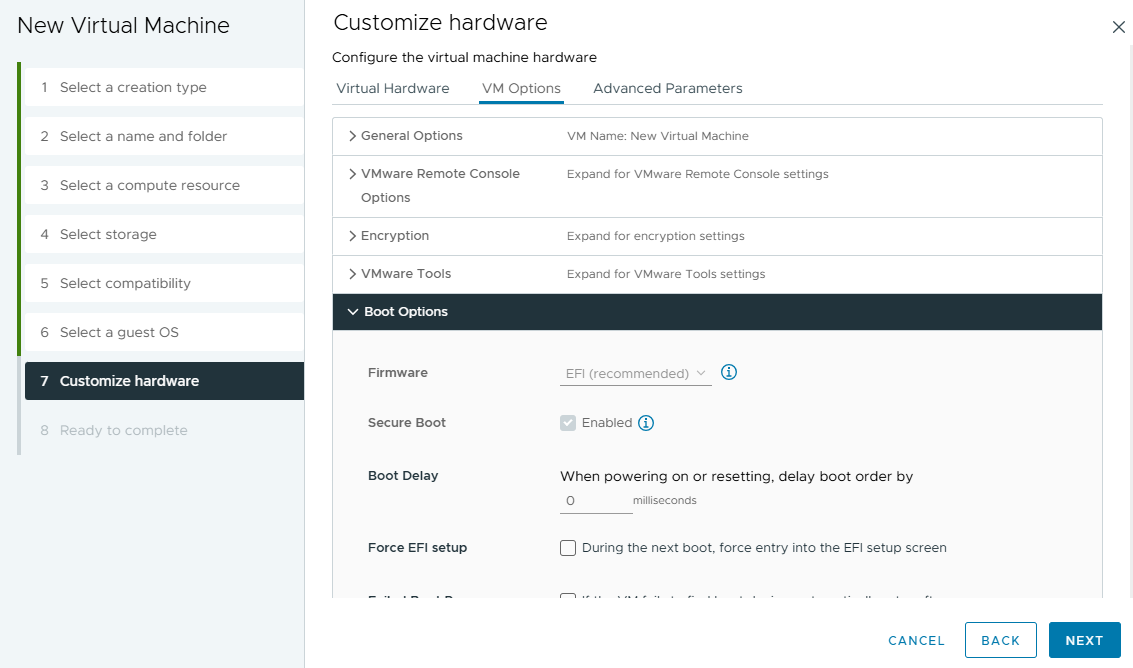
The Expose hardware assisted virtualization to the guest OS needs to be checked under the Virtual Hardware tab.
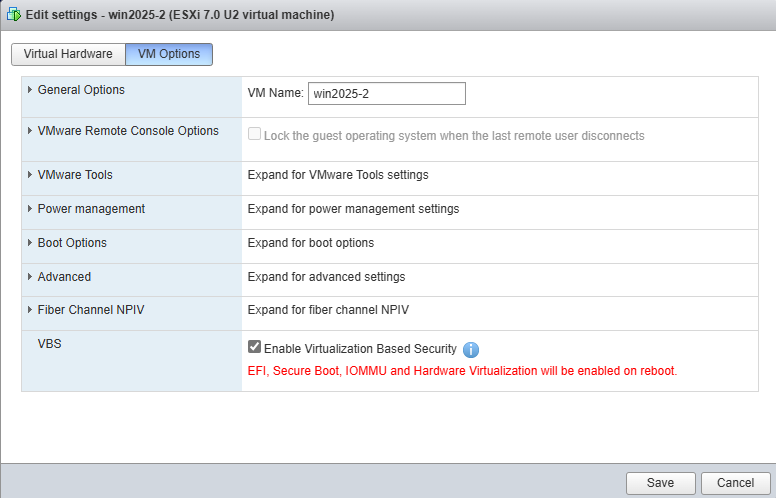
The Enable Virtualization Based Security checkbox needs to be checked under VM Options tab.
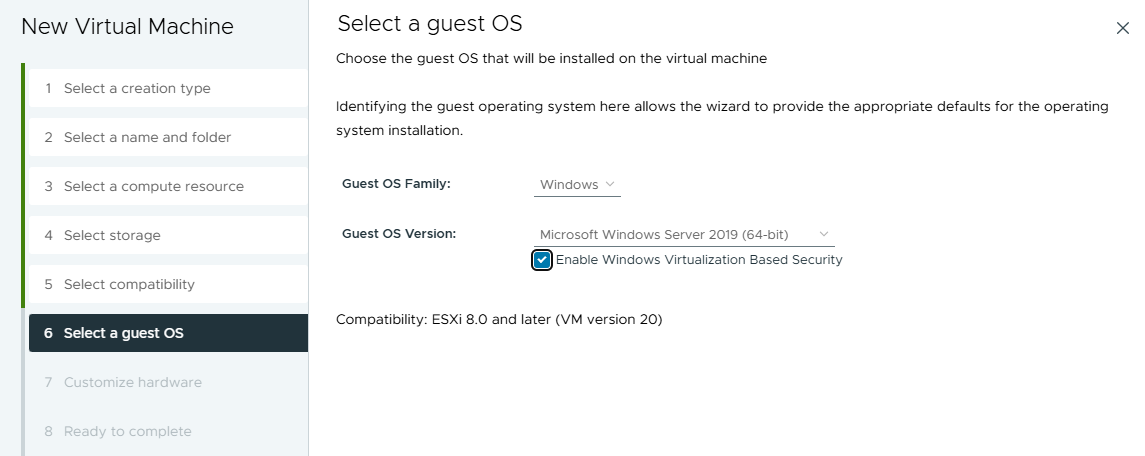
These settings can also be checked when creating a new virtual machine.
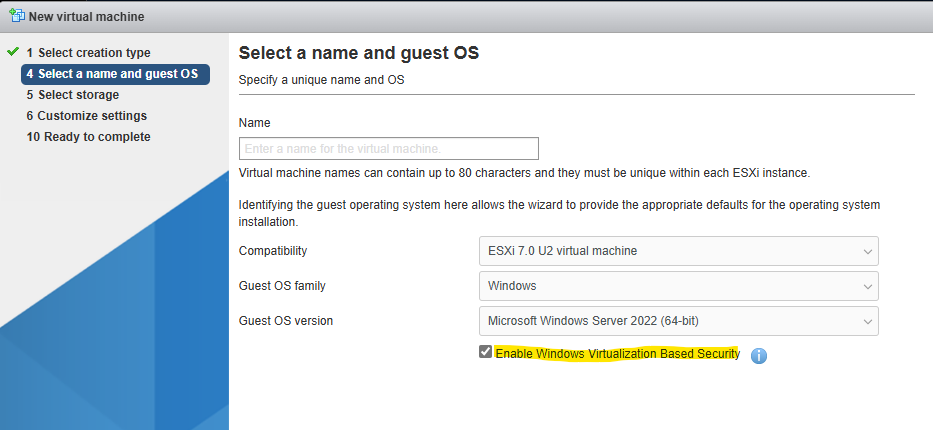
In VMware – vCenter – when creating the virtual machine the Enable Windows Virtualization Based Security needs to be checked.
For Hyper-V, ensure that HypervisorPlatform feature is enabled.
Get-WindowsOptionalFeature -Online -FeatureName HypervisorPlatform
Enable-WindowsOptionalFeature -Online -FeatureName HypervisorPlatform
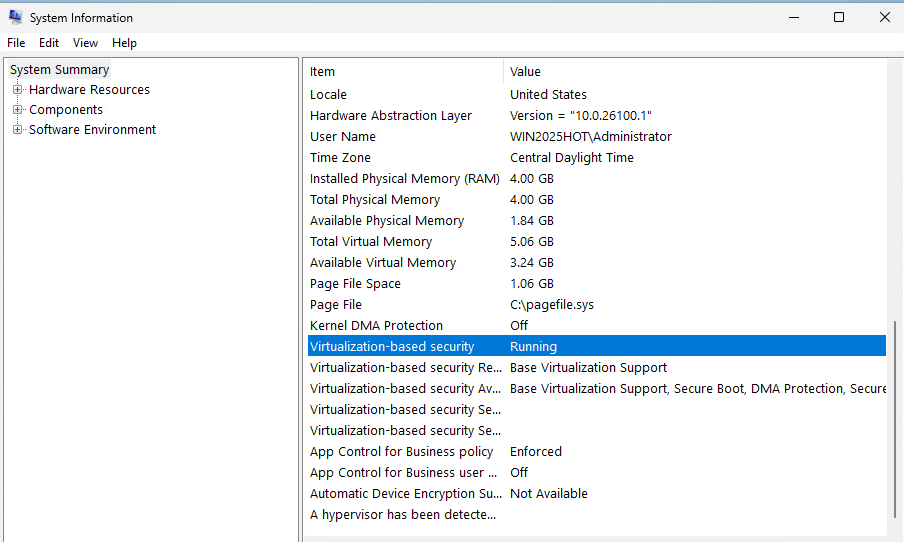
To verify the setup go to System Information on the virtual machine and check the Virtualization-based security service to ensure it is running.
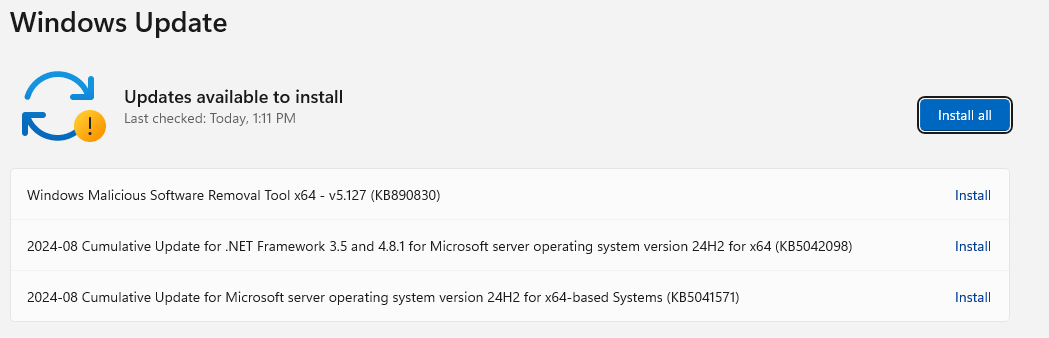
Check for updates either manually within Windows, or use Azure Update Manager to do an assessment of the machine.
If Virtualization is not set properly you will see the KB50415171 update instead of the KB5041570 update as shown below as marked in the 2 screen shots as Incorrect.
(Incorrect)

(Incorrect)
(Correct)
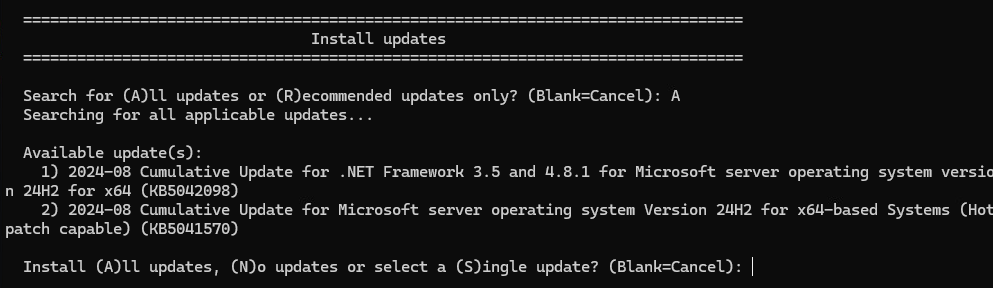
(Correct)

After installing the updates with Azure Update Manager it shows that a reboot was not needed.

Conclusion
Hotpatching represents a significant advancement in server maintenance, offering a seamless way to keep your systems secure and up-to-date without the downtime associated with traditional updates. By leveraging Hotpatching, you can ensure faster installation of security updates, reduced resource consumption, and minimal disruption to your operations. As part of the preview, you can now connect your Windows Server 2025 Datacenter Evaluation edition machines to Azure Arc and manage Hotpatching through the Azure Arc portal and Azure Update Manager. Embrace the future of server maintenance with Hotpatching and experience the benefits of a more efficient and secure IT environment.
Tags: #Hotpatching #WindowsServer2025 #AzureArc #ServerMaintenance #SecurityUpdates #NoReboot #ITManagement #AzureUpdateManager