This document provides a comprehensive guide on creating pre and post maintenance events using Azure Functions in conjunction with Azure Update Manager. Since Azure Update Manager does not patch machines that are turned off, this guide outlines the steps to automate the process of turning on virtual machines for patching and subsequently turning them off if desired. By following these steps, you can ensure that your virtual machines are properly maintained with minimal manual intervention, enhancing the efficiency and reliability of your IT operations.
Want to listen to this topic instead – generated by AI (podcast).
Topics to be discussed:
- Create an Azure Function app to be used for triggering PowerShell scripts
- Set the Identity of the Azure Function
- Set the RBAC role for the Azure Subscription or Resource group to use the Azure Function Identity
- Update the Function App Files versions
- Create Start and Stop functions
- Create Maintenance Schedule – using Dynamic Groups with tags
- Add Event Subscription for Pre and Post Events
- Tag Virtual machines to be started or stopped
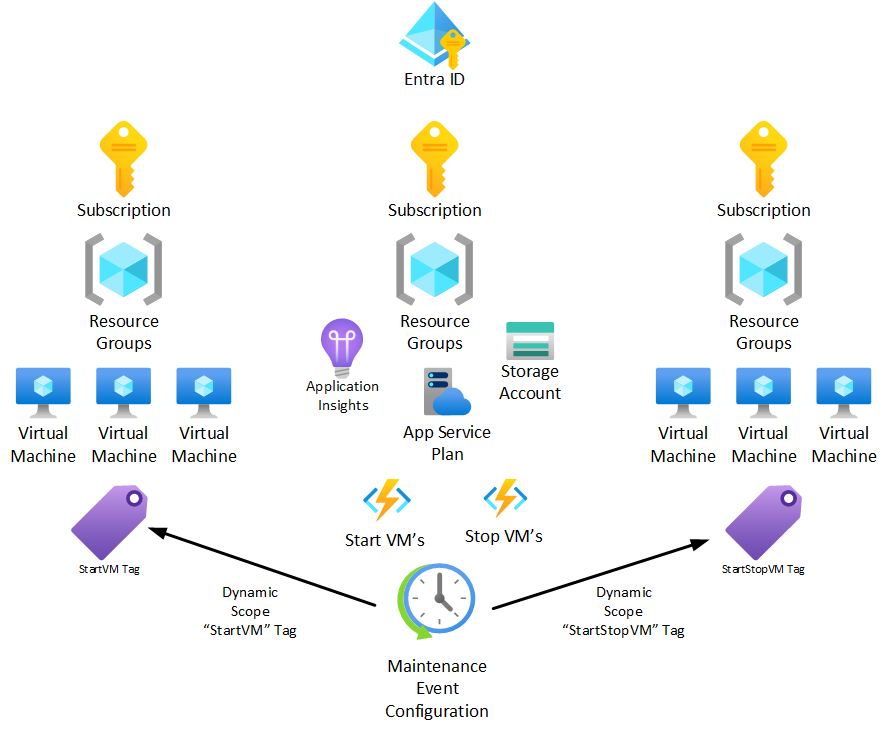
Example architecture drawing:
Create a Function App
- Go to the Azure Portal and search for Function Apps
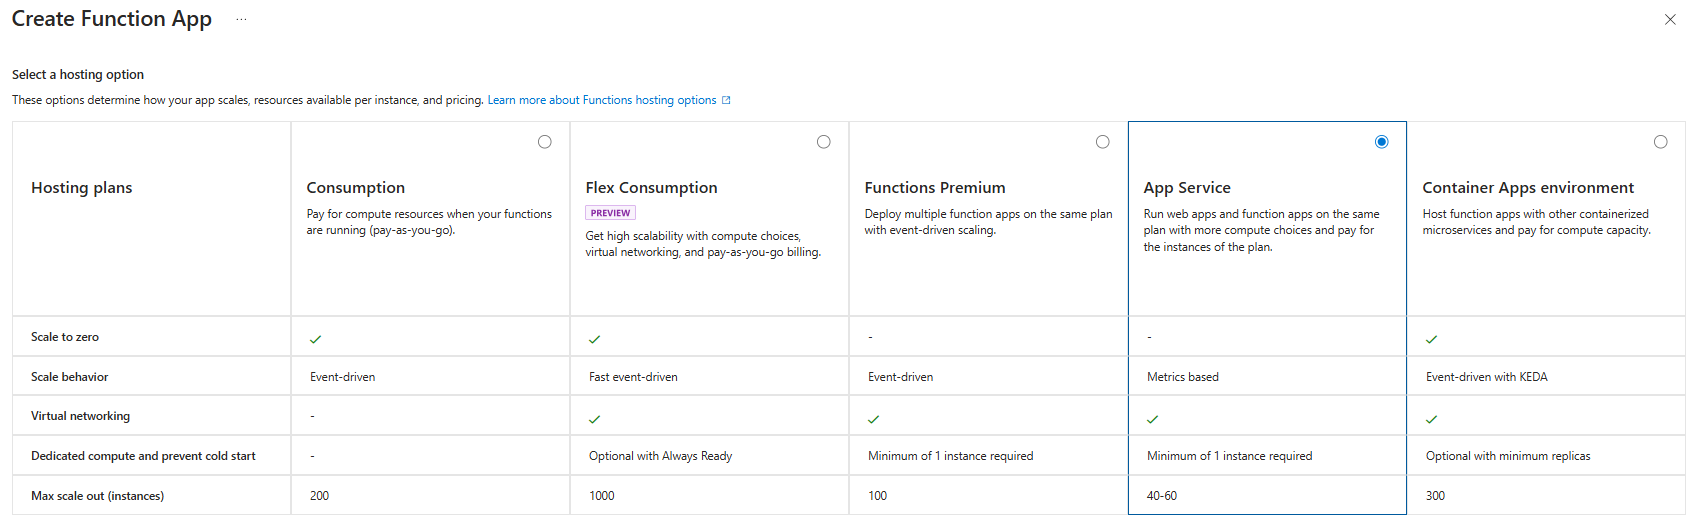
- Select a hosting option
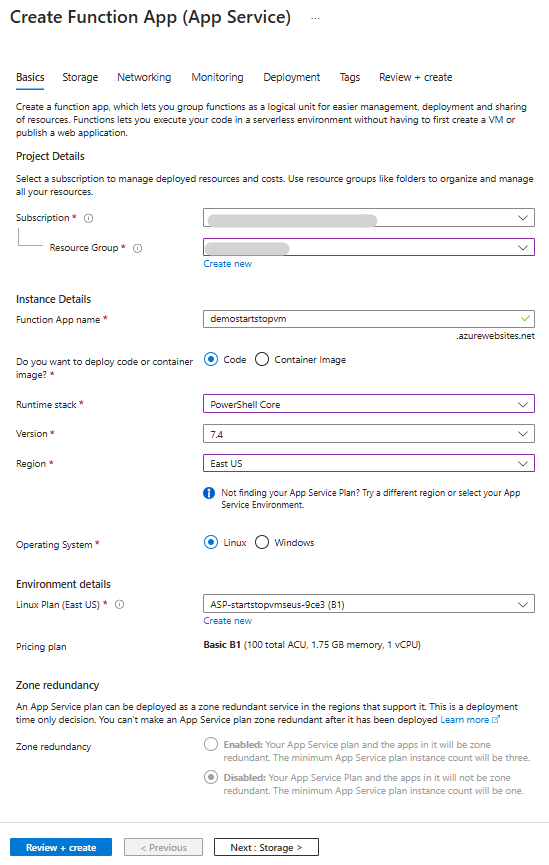
- Fill in the subscription, resource group, function app name, runtime stack (PowerShell Core), PowerShell version and region.
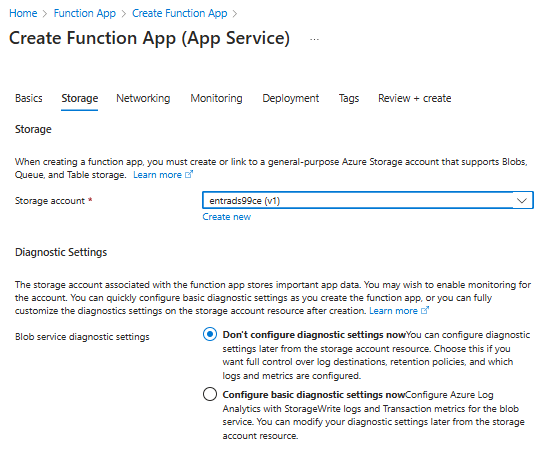
- Create or choose an existing storage account.
- Determine if the application will use public access or if it will use private endpoints.

- The monitoring section is asking if the application should use Application Insights. This is strongly recommended to help troubleshoot the application to see all the transactions that go to the Function app to know what is failing.
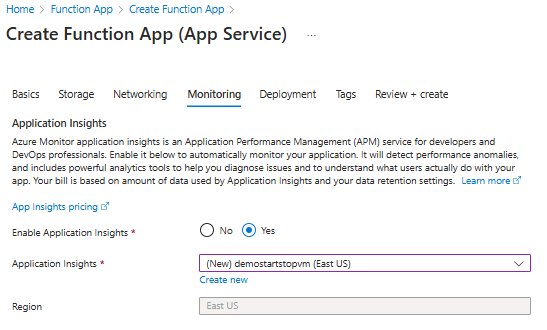
- This demo will skip the GitHub Deployment options
- Hit Next through tabs and hit the Create button to deploy the function app.
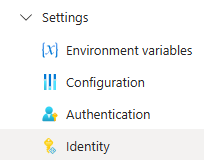
- After the function app is deployed go to Identity under Settings.
Role Based Authentication
- The function app requires that an Identity be added to allow the function to start or stop the virtual machines. A system assigned managed identity, or a user assigned managed identity is required. Choose which to utilize. This demo will use System assigned.

- Hit Save after changing the status to On.
- Assign the Manage Identity to the Virtual Machine Contributor Role on the Subscription or Resource Group to where the virtual machines belong. This allows the Azure Function the ability to start/stop virtual machines.
- Alternatively, a custom role may be created using these permissions.
The specific permissions required are:
- Microsoft.Compute/virtualMachines/start/action
- Microsoft.Compute/virtualMachines/deallocate/action
- Microsoft.Compute/virtualMachines/restart/action
- Microsoft.Compute/virtualMachines/powerOff/action
- For this demo the Contributor Role will be added to the subscription.
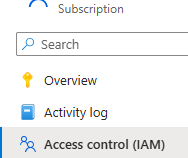
- On the subscription go to the Access control (IAM)
- Click the Add button to add the role assignment.
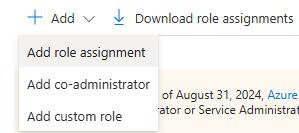
- Under the Role selection choose Privileged Administrator roles to access the Contributor Role.
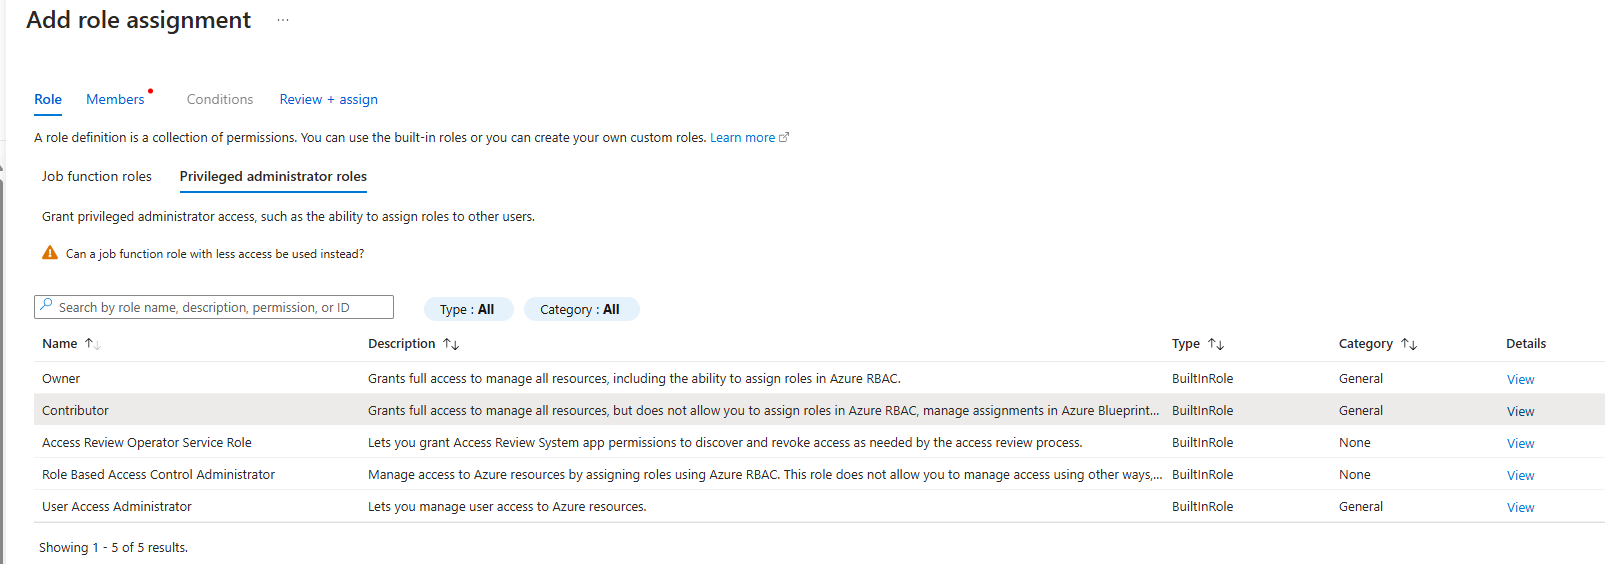
Click Next to assign the role.
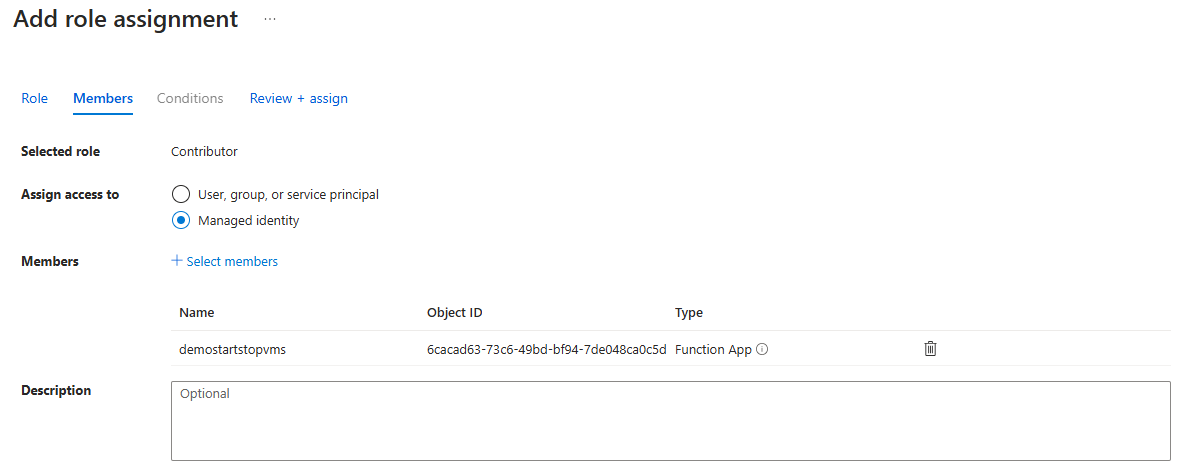
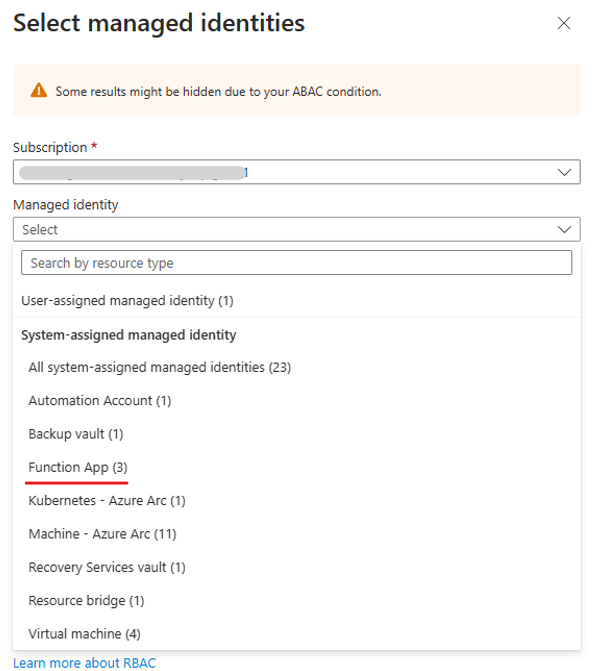
- Under Members select Managed identity, and then hit the Select members button. When selecting a Managed identity in the drop down select Function apps to then select the recently created Function app. Click the recently created app name which is added to the Selected Members area of the form. Click Select to continue.
- Click Review and Assign to assign the role.
- Click Close to return to the assignment.
Set the function app authentication to the storage account
There are 2 options to allow the function app to use the storage account. The default is to use Access Keys from the storage account.
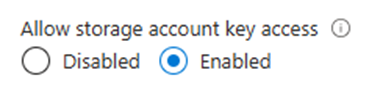
Option 1: On the storage account used to create the function app, go to Configuration under Settings.

On the setting Allow storage account key access, change the radio button to Enabled.
Skip Option 2, and move to continue to modify the function app.
Option 2: Some organizations do not allow for using Storage Account keys. Instead, use the managed identity to allow access to the storage account.
On the storage account, go to Access Control (IAM). Select the button to add a role. Add the role assignment for Storage Blob Contributor.
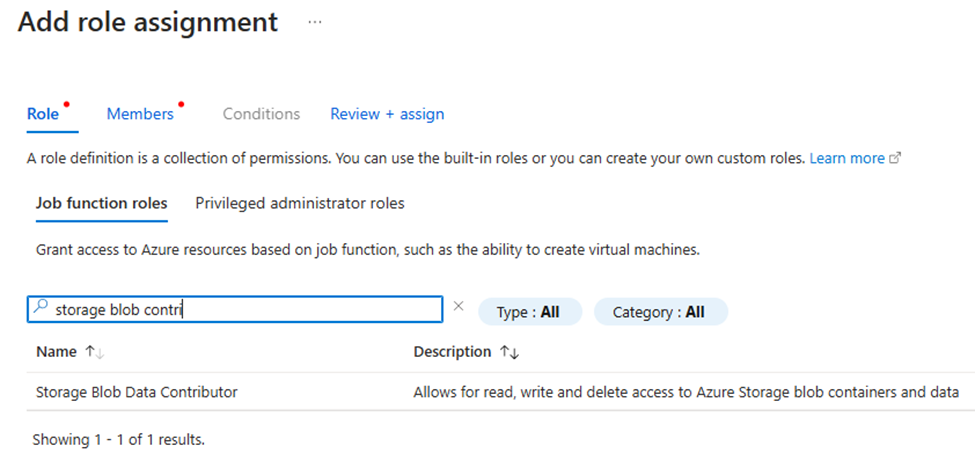
Click Next and then hit the radio button for Managed Identity. Hit the Select members option and choose the Managed Identity of Function app to select the new app.
This will grant the function app the rights to utilize the blob storage using Entra ID.
Click Select and then Next at the bottom. Click Review and assign to add the role.
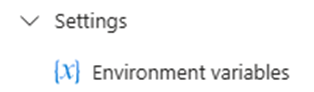
Return to the Function app and click on Environment Variables under Settings.
There are 2 steps that need to be completed.
Step 1. Change the AzureWebJobsStorage value.
Click on the link for AzureWebJobsStorage and change the value to be in the format below, removing the Access Key. Replace (storage account name) with the storage account name.
DefaultEndpointsProtocol=https;AccountName=(storage account name) ;EndpointSuffix=core.windows.net;Authentication=ManagedIdentity
Step 2. Create a new value “AzureWebJobsSecretStorageType”
Click the Add button. In the Name field type: AzureWebJobsSecretStorageType
In the Value field type: Files

Click Apply.
This change allows the managed identity to access the blob storage for the function app.
If the function app shows errors on these changes, be patient as it may take a few minutes for this to apply properly in the background.
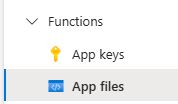
Modify the Function app – App Files
Return to the Function app. Select App files under Functions.
- Under the function app / host.json is the default json that is presented. The key piece is to ensure that the dependency is enabled: true.
{
  "version": "2.0",
  "managedDependency": {
    "Enabled": true
  },
  "extensionBundle": {
    "id": "Microsoft.Azure.Functions.ExtensionBundle",
    "version": "[4.*, 5.0.0)"
  }
}
- Under requirements.psd1 change the json for the Start or Stop VM
@{
 'Az'='12.*'
 'Az.ResourceGraph'='1.0.0'
 'Az.Resources'='6.*'
 'ThreadJob' = '2.*'
 }
NOTE: If the app fails to deploy PowerShell modules check the latest version of the resource’s versions and update accordingly.
- Click the Save button
- Restart the function app from the Overview tab to load the dependencies that are mentioned in the requirements.psd1 file.
- On the Function overview page, click the “Create Function” button.
- In the Select template search box type event grid. Select the Azure Event Grid trigger.
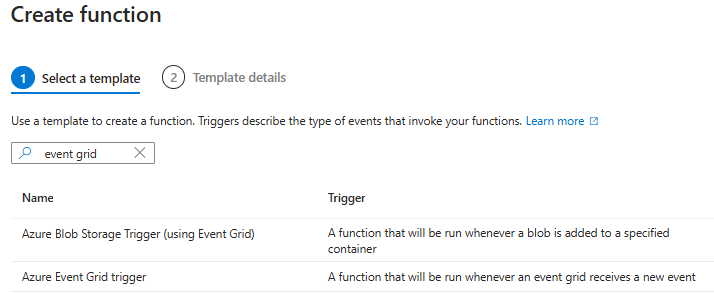
- Click Next
- In the Function name text box. Enter a name for the trigger.
- Ex: startvmEventGridTrigger
- Click the Create button.
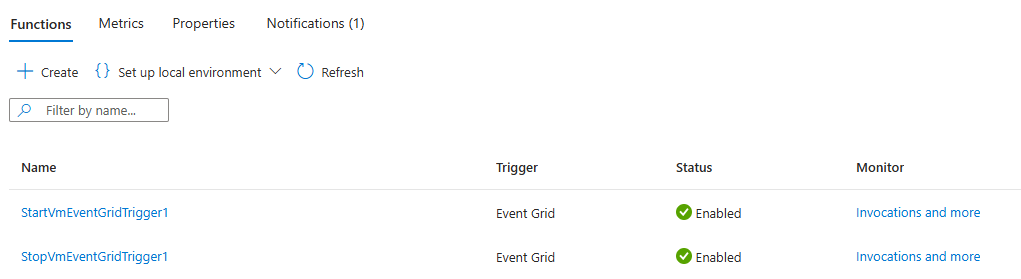
- The screen should change to show the function with sample code on the Code + Test tab. Modify the JSON to run the code snippet. The link to the code snippet is here for both the Start and Stop VMs. Copy and paste the json from the script to paste into the page. (Start/Stop code)
- Click Save.
- Click Create Function button to create a StopVM function.
- In the Function name text box. Enter a name for the trigger.
- Ex: stopvmEventGridTrigger
- Click the Create button.
- The screen should change to show the function with sample code on the Code + Test tab. Modify the JSON to run the code snippet (here).
- The referenced PowerShell script checks to see if the Az.ResourceGraph module is installed. This is a change from the original published Microsoft Article.
#Install the Resource Graph module from PowerShell Gallery
if (-not (Get-Module -Name Az.ResourceGraph -ListAvailable)) {
    Install-Module -Name Az.ResourceGraph -Force
}- Click Save.
Create a maintenance configuration
- In the Azure Portal search bar type in Maintenance Configuration
- Select Create

- Select the subscription and Resource Group. In the maintenance scope select Guest Patching.
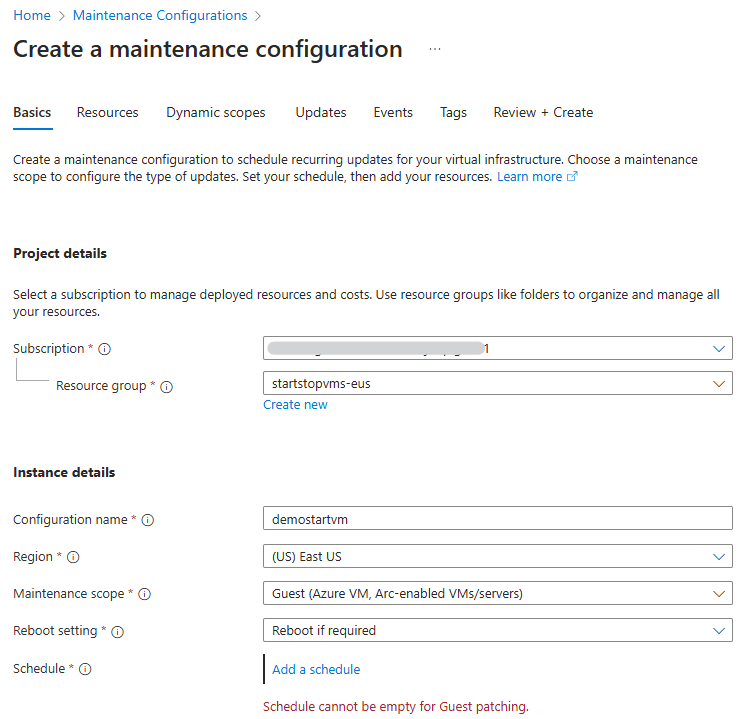
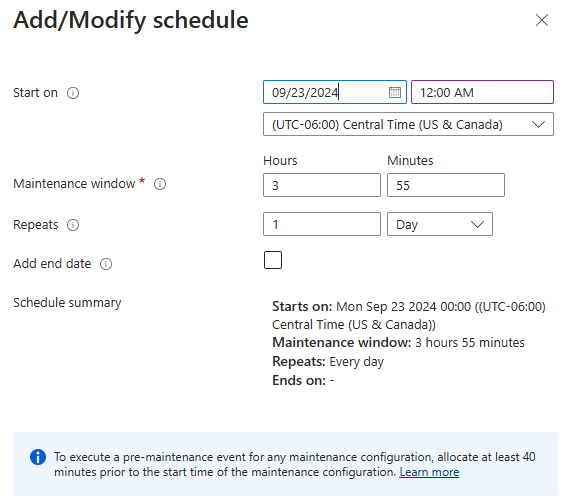
- Click Add a schedule to set the date/times
- Click Next
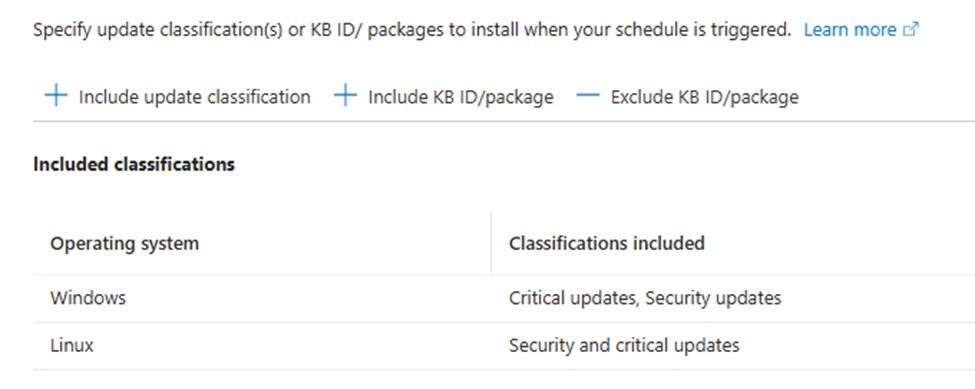
- If there are specific resources to add, click the + Add Resources button. Also check the Classifications to Include. If other updates need to be added, click the + Include update classification to add other optional updates.
- Click Next to configure Dynamic Scopes
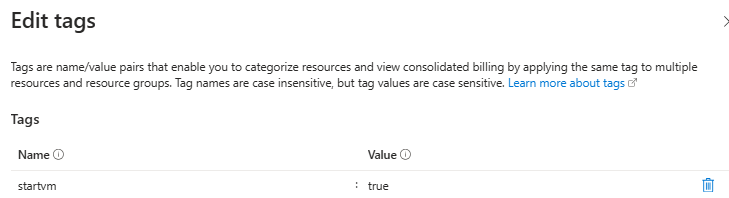
- Select a subscription and click the Filter by Select button. This demo is using tags. A tag of “startvm” with a value of “true” is what is being used.
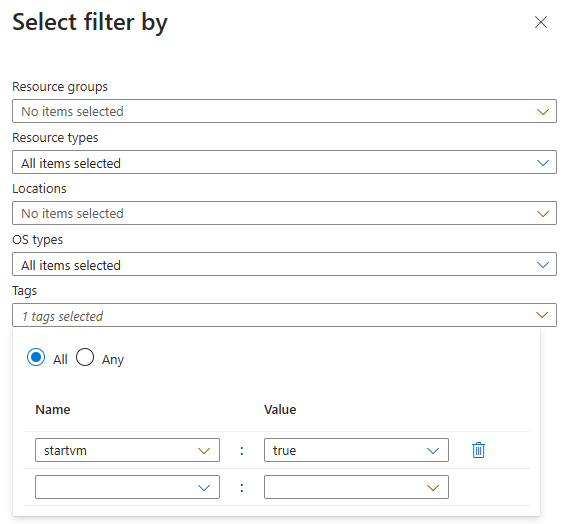
- Click Save to save the Dynamic Scopes
- Click Next to go to Updates
- On the Updates page, unless specific a KB is required to be installed or not installed.
- Click Next to configure Events to call the Azure Function.
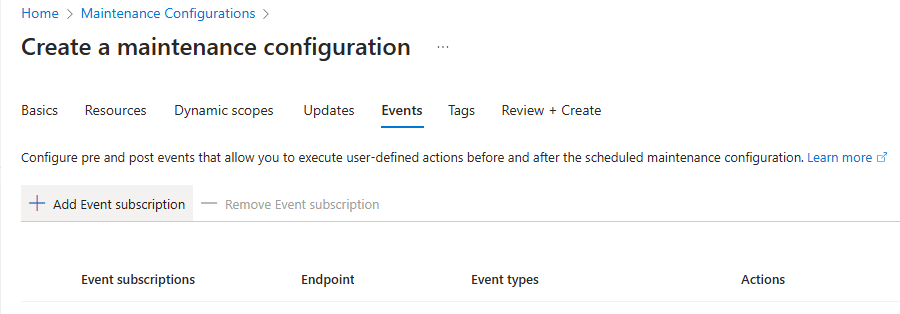
- Click the Add Event subscription
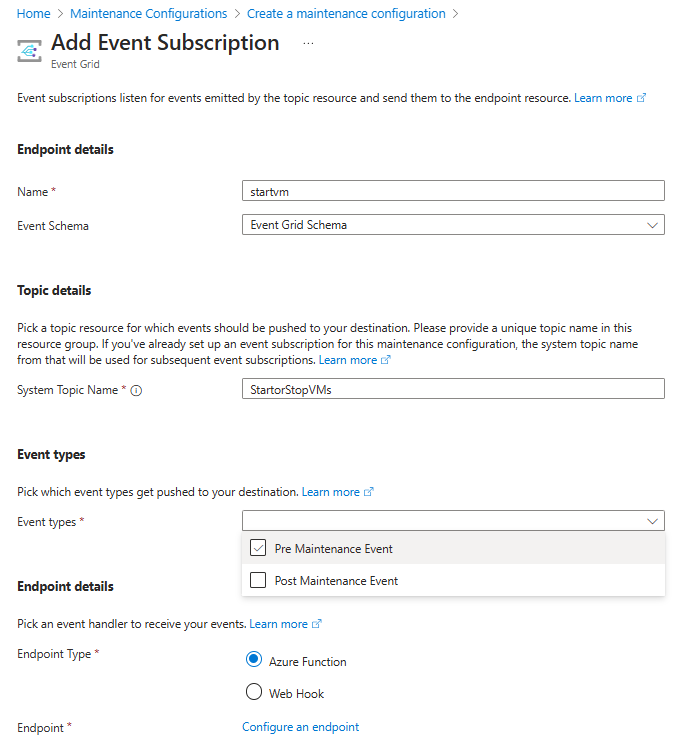
- In this demo we are creating 2 different events. One to start the virtual machine and another to stop the virtual machine. Each will be assigned to an event type. Create a unique System Topic name for the functions. On the Event types select Pre Maintenance Event. This will be used to start the virtual machines. The endpoint type will be an Azure Function. Click the Configure an endpoint link.
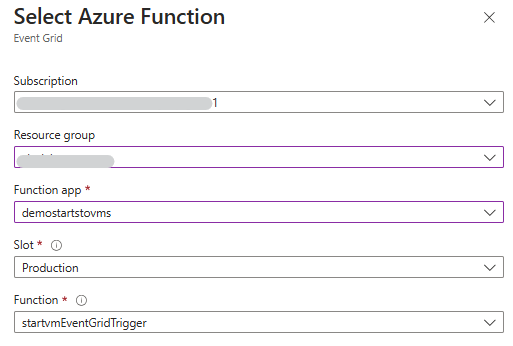
- Select the subscription, and resource group. The Function Apps should pre-populate the drop down box. Pick the right Function from the drop down box and click Confirm Selection.
- Click Add.
- If the intention is to stop the virtual machine after it is updated add another Event Subscription and choose Post Maintenance Event.
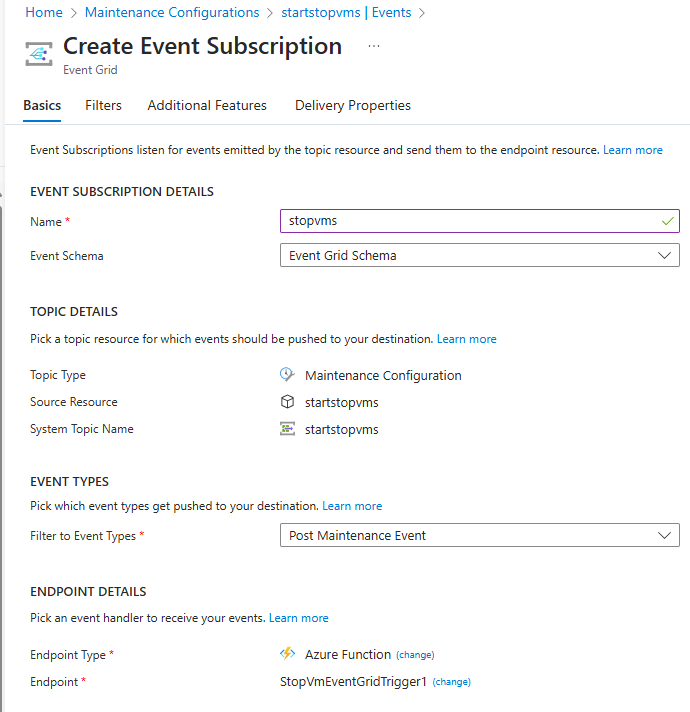
- This step assumes that the Function has been created with the Stop VM code added in the steps above.
- Click Next and then Review + Create. Click Create to complete the maintenance plan.
Verify machines are tagged properly
In this example the tag of “startvm” with a value of “true” is used on virtual machines that need to be started with a Pre script event.
In the scenario that the VM should be started, and then install updates, and then stopped another tag could be created “startstopvm. This tag would have a different Maintenance plan associated to do multiple events. This maintenance plan would have both pre and post maintenance events attached to it.
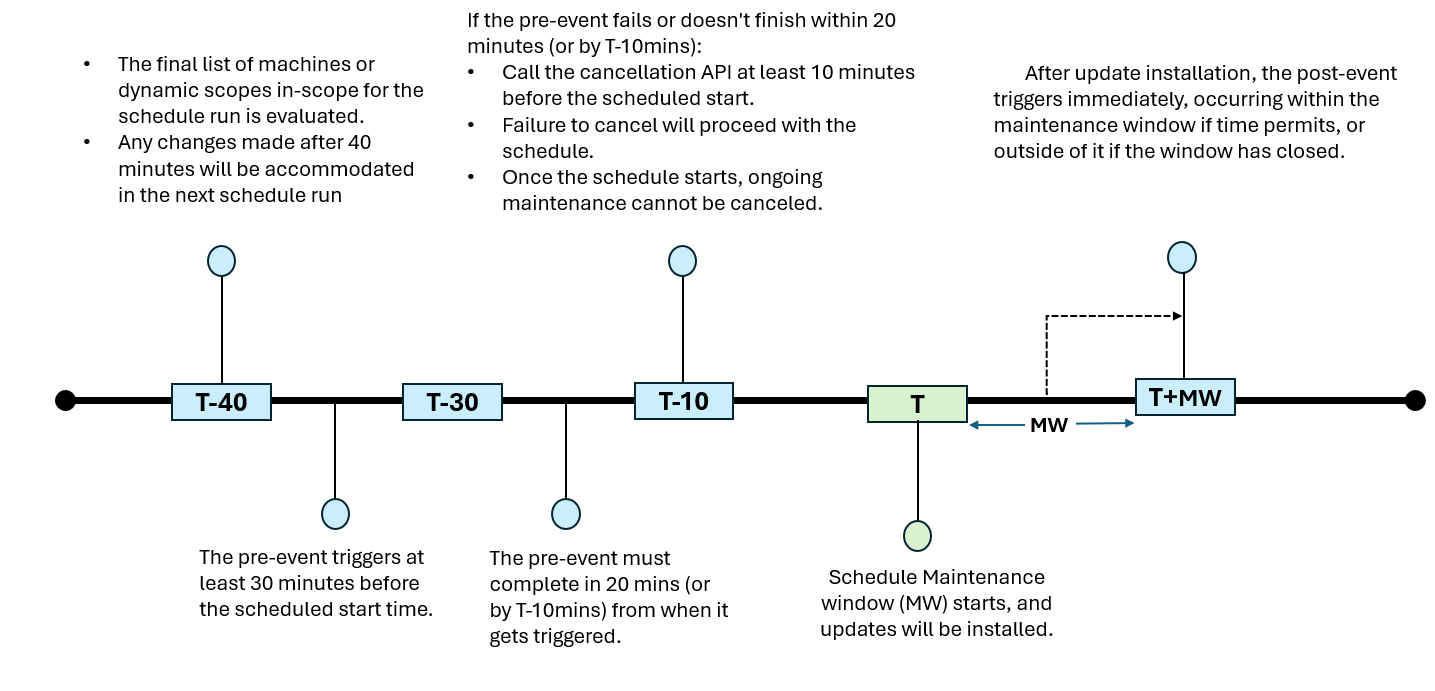
The Microsoft documentation has good examples of the timing of the pre and post events. This diagram is from the documentation below. Reference Article (here).
Troubleshooting
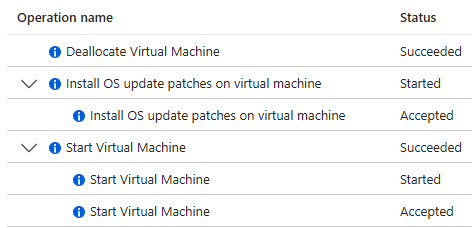
To verify a machine was start or stopped review the virtual machine’s Activity log.
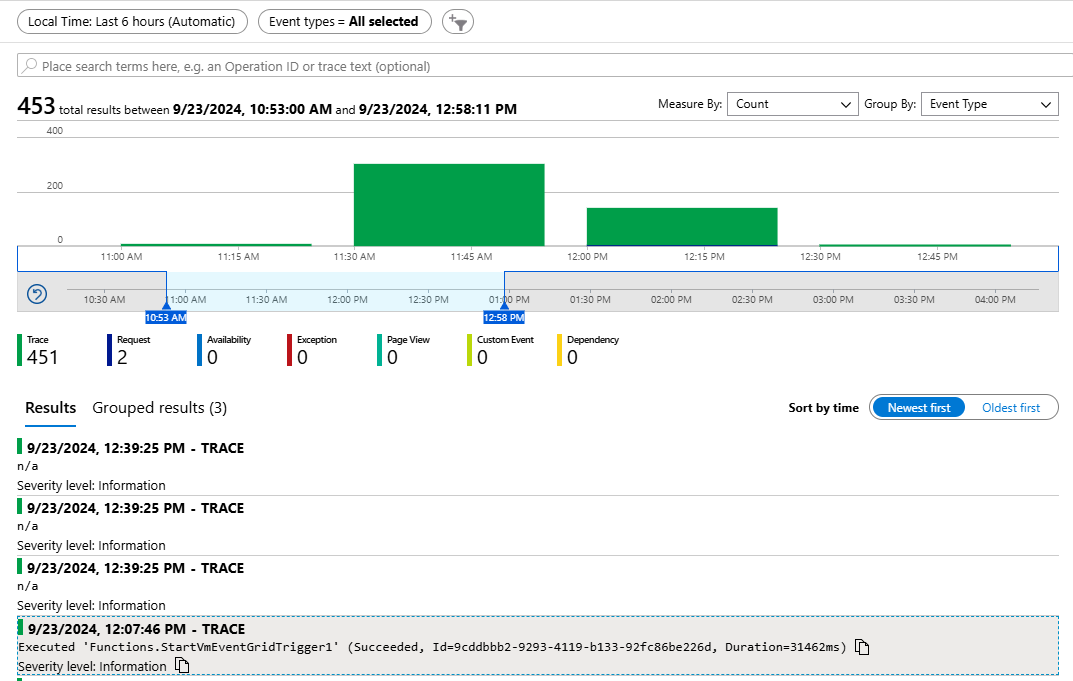
If Application Insights was used it will show the Function triggers that were executed.
In conclusion, leveraging Azure Update Manager with pre and post script actions significantly enhances the efficiency and effectiveness of your virtual machine maintenance processes. By automating the start and stop actions of virtual machines using Azure Functions, you ensure that all necessary updates are applied without manual intervention. This approach not only saves time but also reduces the risk of human error. Additionally, the use of tags and dynamic groups allows for flexible and targeted maintenance schedules, ensuring that only the required virtual machines are affected. Implementing these strategies will lead to a more streamlined and reliable update management process, ultimately contributing to the overall stability and performance of your IT infrastructure.
Microsoft Reference Documentation: Create pre and post events using Azure Functions. | Microsoft Learn